
Before diving into how to add meta title and descriptions, it is necessary to understand “meta tags.” Meta tags are a type of HTML tag that provide search engines with the website page information. In here, Shopify meta tags or in general, meta tags are important because they sometimes affect your brand image and Click through rates. Title and description are the basic element and most-used tags for SEO, without these you will only be able to see the URL of a webpage.
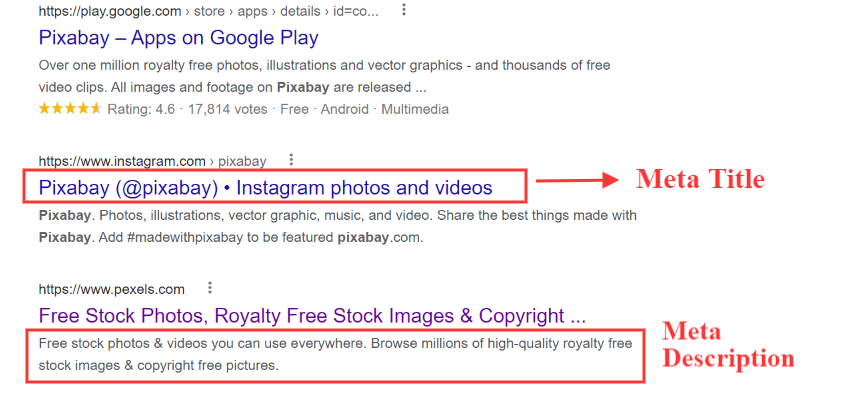
The meta title is the HTML title tag that refers to the text displayed in blue color on search engine pages or browser tabs depicting the title of the webpage. On the other hand, the meta description is an HTML element that describes webpage content in (around 150) snippets for the benefit of search engines and users.
They are crucial to effective SEO practices and for organic search as search engines analyze the title and description of your page to steer your page and rank as per it. In Shopify or e-commerce sites, meta tags are important to rank your products accordingly. However, for that, you should also know how to add meta tags in Shopify.
Therefore, in this guide, we will tell you how to add Shopify meta tags (meta title and description). It is a quick and easy tutorial with the help of the Shopify seo app – SEO Doctor.
To add Shopify meta titles and descriptions, go to SEO Doctor – Shopify SEO App.
Then, navigate to the “Add app” button and log in to your Shopify store by adding the URL and clicking on the login button.
Further, click on the install app to download the SEO Doctor app in your Shopify store.
Once the app is installed, navigate to Apps > SEO Doctor and it will take you to the SEO Doctor Dashboard.
In the dashboard, go to the “Products” section and select the product and click on the “Fix Issues” button, for which you want to change the meta description and meta title in Shopify.

It will open up to a dialogue box of “SEO Score”, where you will see different sections.
Under the “Target Keyword” section mention the main high-rank keyword. You can also get keyword suggestions by clicking on the “Get Keyword Suggestions’ button. If the keyword section is blank then it will show you a cross sign, which means you have not put a keyword and it will decrease your seo score.
Next, go to the “MetaData” section where you will see Meta Title and Meta Description option. Enter Shopify meta title which should not exceed the length of 70 characters. Then, go to the meta description box and enter a valid description that should not exceed 150 words.
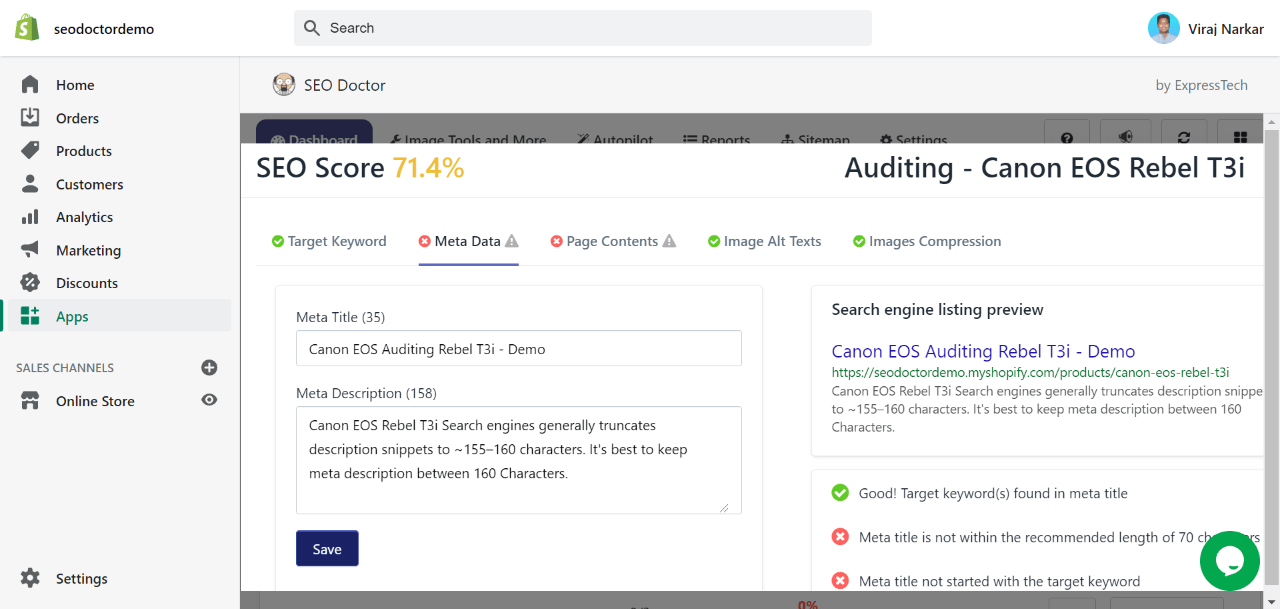
On the right side of the box, you will see error suggestions and things you’ve done correctly. Based on that, make the seo friendly Shopify meta title and meta description. Once done, click on the ‘Save’ button.
Then go to “Page Contents” and mention “Page Title” and “Page Description” of your content. Click on the “Update” button.
This is how within minutes you can manually in Shopify seo app add the Shopify meta tags.
However, if you don’t know much about Shopify meta tags like how to optimize meta title and description. Then, you can provide permission to the SEO Doctor and it will automatically optimize your meta title and Shopify meta description.
To automatically optimize meta title and description, follow the following steps:
Go to the “Autopilot” option and enable the “Meta Title” and “Meta Description” optimization, Then set the conditions and further rules for both sections.
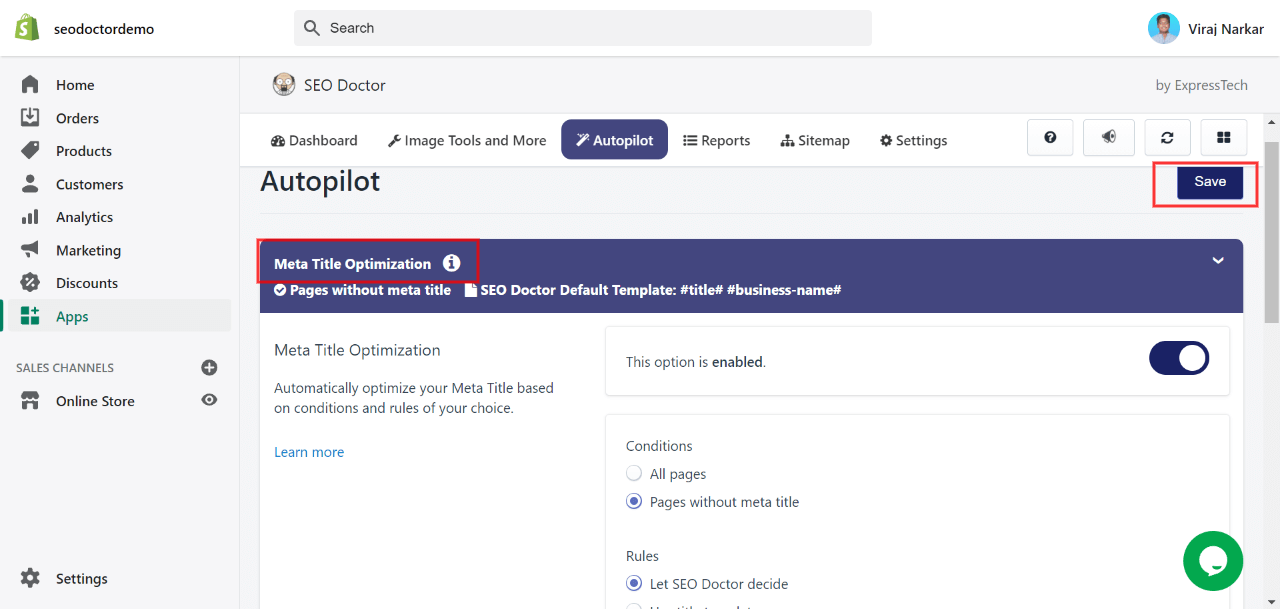
(Note: Opt for the “Let seo doctor decide” option under rules if you are not familiar with templates.)
After you’re done, save and update your changes by clicking on “Save” in the top right corner.
This is the end of “how to add meta title and description in Shopify?” tutorial guide. In just a few easy steps your Shopify meta tags are added. Now, don’t wait and click on the below button to add useful and excellent Shopify SEO app.